
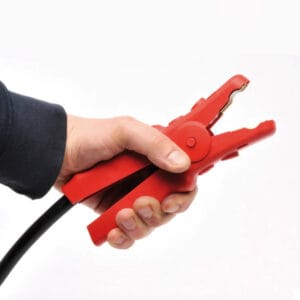


Mounting battery clamps requires attention at every step. A mistake can lead to loss of contact, heating, or other issues, so it's important to pay attention to both the materials and how they are assembled.
The PCB-402 battery clamps are designed for mounting on cables with cross-sections between 35 and 50 mm², which are common in this type of application.

What is needed to mount battery clamps
To mount battery clamps, the following elements are needed:
- PCB-402 Battery Clamp
- Electrical cable between 35 and 50 mm²
- Tubular terminal with M6 hole
- Crimping tool compatible with the cable section
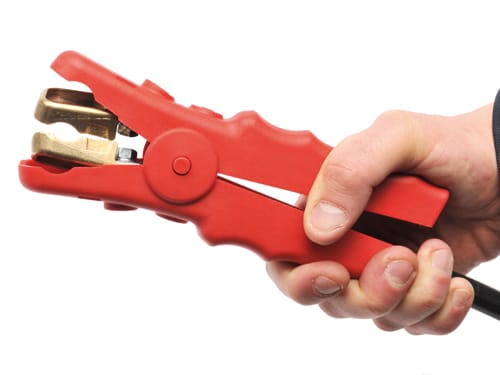
The PCB-402 clamps are fully insulated and have a front and side connection. In addition, they have a large contact surface with the battery terminal and a 16mm² mass mesh. The cable can be fixed by means of a terminal or by a screwed plate, depending on the model chosen.
The range is made up of four references:
- PCB-402-TR: Red Clamp with Screw Connection
- PCB-402-TN: Black Clamp with Screw Connection
- PCB-402-PR: Red clamp with plate connection
- PCB-402-PN: Black clamp with plate connection
Step by step
The assembly of the PCB-402 clamps is done in five simple steps:
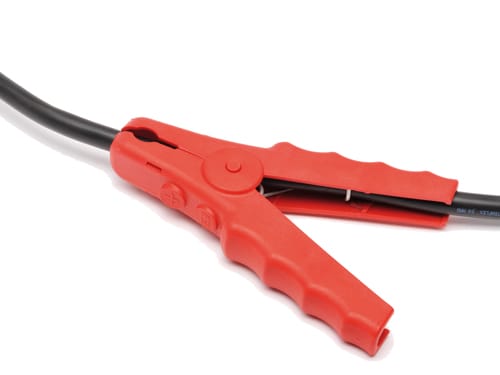
1. Thread the cable inside the clamp before making the connection.
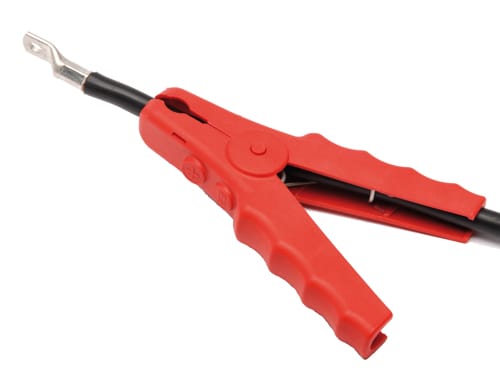
2. Staple the cable, with a cross-section of between 35 and 50 mm², to a tubular terminal with M6 drill.
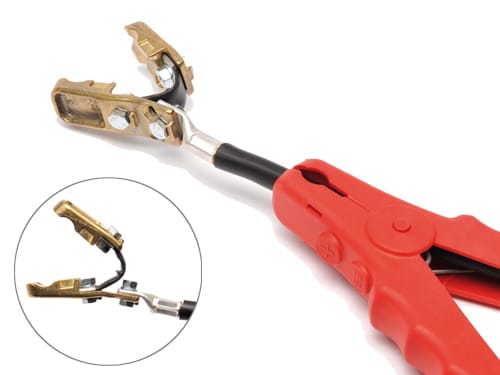
3. Attach the terminal to the clamp.
4. Insert the connection clamp into the insulating part.

5. Press until the clamp is embedded in the insulation and the fixing "click" is perceived.
Once the process is complete, the battery clamps are completely insulated and ready for use.
Considerations to take into account
The crimping of the tubular terminal is one of the most delicate points when mounting battery clamps. If not done correctly, the contact may be poor or loosen with use, so it is important to use a suitable tool and check that the terminal is securely attached to the cable.
In the same way that it is so important to use a good crimping tool, you have to use a wire of the correct cross-section. It is also advisable to make sure that the connection clip is properly fitted into the insulator. Forcing the assembly or skipping a step often leads to problems later on.
In the catalogue of XB Components you'll find the PCB-402 battery clamps, along with tubular terminals and shrink tubes to complete the assembly.
Consult the catalog and find all the components necessary for the assembly of battery clamps.
VIEW CATALOGXB Components, a leader in the electrical components industry, is recognized for our commitment to quality and customer service. Our mission is to provide innovative and high quality solutions that meet the needs of our customers.
Subscribe to our newsletter
Subscribe to our newsletter
We will inform you about news, promotions, events...